To correctly lay loft boards without damaging the floor or insulation, ensure the insulation is not compressed and rests evenly between joists with the right tools. Utilize loft legs to elevate the boards above the insulation, maintaining airflow and preventing compression. Secure the boards to the loft legs using an electric screwdriver for a stable platform. This method preserves both the structural integrity of the loft flooring and the effectiveness of the insulation within the roof structure, setting a foundation for potential loft conversions. Further guidance offers ideal approaches to enhance this foundational work.
Key Takeaways
- Use loft legs to elevate boards, maintain insulation thickness, and prevent compression during loft flooring installation. This ensures the insulation beneath the boards remains effective and doesn’t lose its thermal properties.
- Measure and cut boards accurately to ensure they fit without forcing. Proper loft flooring installation requires precise measurements to avoid gaps or overlaps that could lead to instability.
- Drill pilot holes before screwing to avoid splitting the wood and damaging the joists. This step is crucial for preserving both the boards and the structural integrity of the loft during the installation process.
- Distribute boards evenly across joists to balance weight and preserve structural integrity. A well-balanced layout helps prevent sagging and maintains the safety of your loft space.
- Ensure boards do not cover ventilation areas to maintain adequate airflow. Proper loft flooring installation includes considering air circulation, which is vital for preventing damp and condensation issues.
How to Lay Loft Boards Safely and Efficiently
To guarantee safety and efficiency when laying loft flooring, it is vital to equip oneself with the appropriate tools, including a tape measure, saw, drill, screws, and gloves. Before starting, ensure that your loft’s joists are strong enough to support the new boards in the loft. It’s also a great idea to assess the loft area to determine if the existing boards are in good condition or need replacing.
A detailed, step-by-step guide on how to lay boards in the loft can assist in the proper installation, ensuring that the boards are securely fixed and evenly distributed. This will help you make the most of your floor space while avoiding uneven surfaces, which can be problematic when storing heavier loads. If you’re working near the eaves or around rafters, take care of these areas for obvious reasons.
Additionally, when working with existing insulation, it’s important to raise the boards to prevent compression, which could prevent condensation and maintain the insulation’s warm effectiveness. Installing the boards higher will also ensure you do not disrupt airflow, which is essential for ensuring safety and avoiding condensation in the long run.
Using a pull-down ladder is an excellent way to access the loft safely, and always keep things tidy while working around the walls to avoid accidents. It’s also a good idea to wear gloves to protect your hands from any rough edges or sharp timbers as you move around the loft. When laying the boards, remember that the edge of each board should line up neatly, and you should double-check that everything is in place before walking on the surface.
Finally, ensuring that the timbers are properly spaced will guarantee a strong and stable base, allowing for safe use of the loft area for storage or future living space.
What Tools Do You Need to Board a Loft?
Before beginning the task of laying loft boards, it is essential to assemble the appropriate tools to guarantee both safety and efficiency. Selecting the right equipment will facilitate the installation of loft boards over ceiling joists while preserving the integrity of loft insulation. An electric screwdriver speeds up securing loft boards to the joists, ensuring a firm fit, especially when accessing the loft hatch. Loft legs can raise the loft flooring above the insulation layer, allowing for easy access, preventing compression, and maintaining thermal performance.
| Tool Type | Use Case |
| Electric Screwdriver | Fastening loft boards to joists |
| Loft Legs | Elevating boards above insulation |
| Tape Measure | Ensuring accurate placement and fit |
These tools are fundamental for efficient loft space utilization and proper installation.
Step-by-Step Guide to Installing Loft Boards
Having gathered the necessary tools as previously outlined, the loft boards can be installed.
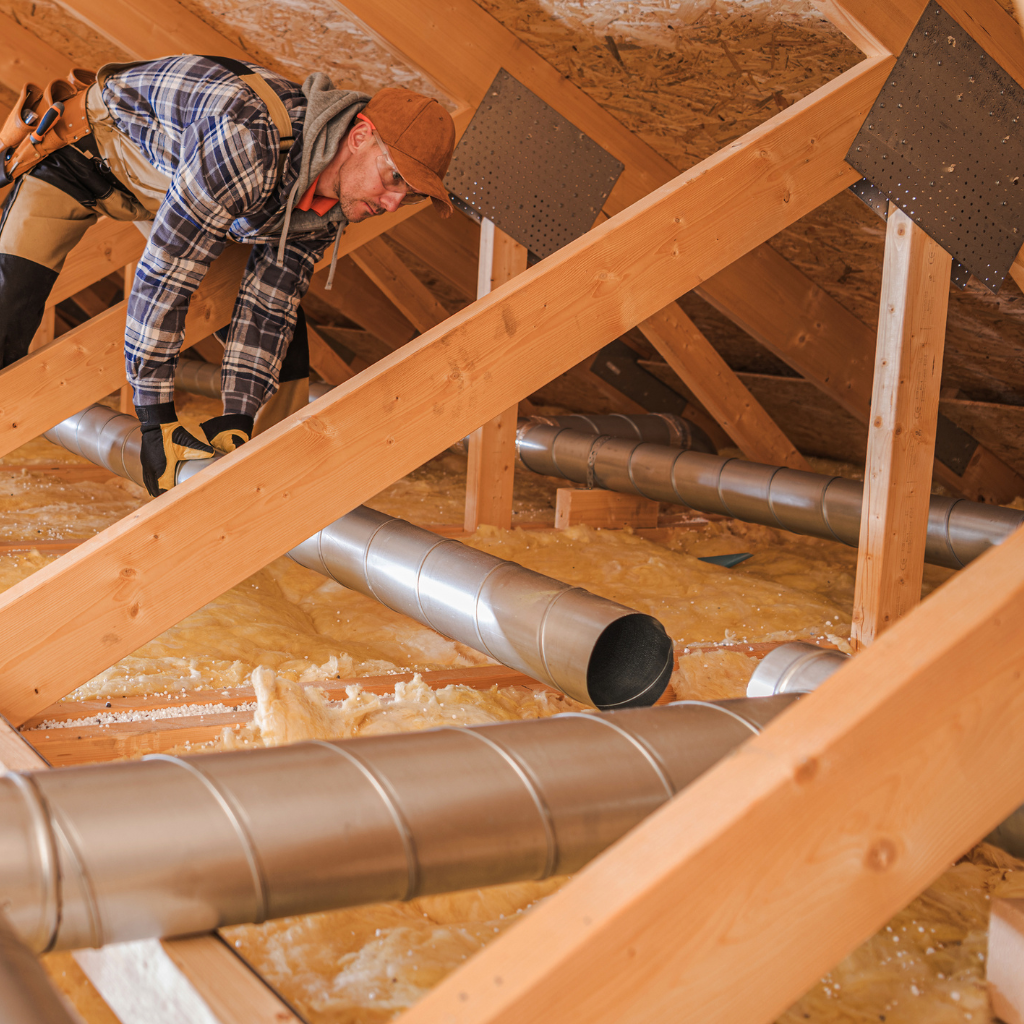
Ensure the insulation depth is sufficient and properly laid between the joists or trusses. It’s vital to avoid compressing the insulation, as this diminishes its effectiveness. Install loft insulation carefully above the ceiling joists, focusing on maintaining its loft to preserve energy efficiency and ensure usable storage space.
Next, position the loft legs atop the joists, creating a raised platform that supports the loft boards while preventing insulation compression.
Securely fasten the loft boards to these loft legs, ensuring they are stable and evenly distributed across the roof trusses. This method not only optimizes insulation performance but also enhances the structural integrity of the loft flooring installation.
Most people undertaking this project consider using a dust mask to avoid inhaling particles during installation, as working in confined loft spaces can stir up dust and debris. If you’re unsure about the installation, recommend hiring a professional, especially if structural adjustments are needed or if you want to ensure the job is done efficiently and safely.
How to Raise the Boards Over Insulation
Raising loft boards over insulation in your loft requires meticulous attention to detail to guarantee safety and efficiency. For most loft boarding jobs, utilizing loft legs or stilts is essential to raise the loft floor above the insulation layer. This setup preserves the insulation’s thermal efficiency, ensures things are tidy, and guarantees proper airflow. Using knee pads can be beneficial during this process to protect your knees as you work through the preparation phase.
Installing these supports correctly will create a raised platform, allowing for the placement of loft boards that transform the area into usable loft space without compressing the insulation beneath. This method also ensures a gap between the insulation and the underside of the boards, preventing dampness from developing and ensuring proper ventilation. You’ll need to fill any voids with suitable material to ensure no weak spot or unprotected area.
Once you’ve decided on the correct layout, the length of each board should be measured carefully before securing them with a hammer. For areas around pipes, cut the boards to fit neatly, ensuring airflow is still around these vulnerable areas. Always double-check the placement of the boards to ensure they are aligned correctly.
When finished, the raised platform will not only give you additional usable loft space for storage. Still, it will also help preserve the integrity of the insulation, ensuring that you maintain the loft’s energy efficiency. A well-executed loft boarding installation can also save you money on heating in the long run by preventing heat loss.
As a side note, can I lay insulation over loft boards? It’s generally not recommended unless the insulation is fully protected and does not restrict airflow. Loft boarding jobs should always prioritize your space’s safety and functionality.
What are the Benefits of Loft Boarding?
Loft boarding is essential for homeowners seeking to maximize their attic space and enhance insulation. Installing loft boards across the joists not only secures additional storage areas but also helps protect the thermal integrity of the home, potentially reducing heat loss.
The center of the attic, where the joists are typically stronger, is the ideal place to start the installation. The result is a well-structured loft offering loft storage solutions for your possessions, ensuring you can store items safely and efficiently. If the space is tight, the boards can be laid at this stage while ensuring there are no obstructions, such as pipes or electrical wires.
It’s worth checking that the boards sit fine across the joists, ensuring stability. For deeper attic spaces, you may need to lift the boards higher, creating a more secure platform for your storage. A thorough list of the materials needed beforehand will help you avoid mistakes and ensure everything fits together seamlessly.
At each point of the installation, especially when working around tricky areas, keep in mind that the expansion of wood is a factor, so leave a slight gap between the boards. Doing so will create a more efficient and safer loft storage area. Once installed, you’ve successfully converted your attic into a usable space that adds value to your home.
Why Should You Board Your Loft
Boarding your loft can greatly enhance the usability of your home by optimizing available storage space.
If loft boarding is installed properly, it can create extra storage space. Still, it’s essential to consider how many loft legs are needed without compromising the thermal performance of the current insulation. This is essential as poor loft boarding techniques can lead to compressed insulation, which diminishes its effectiveness and could result in higher energy bills.
By elevating the boards above the insulation, homeowners guarantee that the insulation and loft maintain their intended functions. The benefits of loft boarding include not only additional space and more space for storing items but also maintaining the integrity of the loft’s insulation.
Thoughtful installation maximizes both the extra space and the efficiency of the home’s overall energy use.
Can Loft Boarding Reduce Heat Loss
Can installing loft boards contribute to reduced heat loss in your home? Properly installed loft boards, especially with effective loft insulation in the central area, can alleviate heat loss. The process involves securing loft legs to the joists, guaranteeing that the loft insulation is not compressed, which maintains its insulative properties. Placing loft boards above the insulation then provides an additional thermal barrier. This arrangement minimizes heat rising through the ceiling and escaping through the roof, ensuring it’s not done the wrong way.
To ensure the width of the boards suits the space, it’s a good idea to measure the sheets of insulation and line them up with the joists. You’ll want to avoid any wiring or other obstructions that could be in the way. If unsure, using a temporary work platform will allow you to move more freely and safely. At any point, if you feel the boards are being pushed too tightly into place, take a moment to adjust them so they fit properly without compromising the insulation.
As you install, remember that the loft will likely be used to store suitcases and other stuff, so ensuring the space is organized and free from unnecessary risk is important. If you use the loft frequently, this method will form an ideal storage solution, keeping items off the floor and away from the loft insulation. However, as the process progresses, don’t forget to keep checking back on your past work to ensure everything is in place.
Also, if you’re wondering, can you lay insulation over loft boards—it’s generally not advisable unless the insulation has been correctly protected to maintain its effectiveness. Installing loft decking over the insulation will make the loft more usable. Still, it’s important to suit the type of board used in the area to ensure maximum functionality and energy efficiency.
| Factor | Impact on Heat Loss |
| Loft Insulation | Reduces upward heat transfer |
| Loft Boards | Adds thermal barrier |
| Loft Legs | Prevents insulation squash |
| Installation | Guarantees airtight finish |
| Loft Hatch | Seals potential heat escape |
How Does Loft Insulation Affect Boarding?
Before installing loft boards, it is essential to consider the underlying insulation, as mentioned earlier, which plays a critical role in thermal efficiency and moisture control.
Proper placement and choice of insulation material can prevent heat loss and guarantee that the loft space remains usable and energy-efficient.
Selecting the appropriate insulation for a boarded loft, such as tongue and groove fiberglass or foam board, and correctly installing it below the boarding are pivotal steps to optimize the effectiveness of both the insulation and the loft boarding.
Why Insulate Your Loft Before Boarding
Insulating your loft before laying boards is essential for enhancing energy efficiency and maintaining a stable interior climate.
Ideal loft insulation, typically using loft roll, serves as a barrier that retains heat during winter and repels heat in the summer, greatly reducing heating and cooling costs.
Before initiating a loft boarding project, insulating your loft effectively, especially the top layer, is important to capitalize on these benefits.
Installing loft legs can elevate loft boards above the insulation, ensuring that the insulation’s thickness and effectiveness are not compromised, which is critical for maintaining energy efficiency.
This preparatory step improves the loft area for storage space and sets a solid foundation for potential loft conversion projects.
How to Lay Insulation Below the Boards
When laying insulation below loft boards, it is crucial first to determine the type of insulation material suited for your specific needs. Properly installing insulation beneath the boards guarantees better thermal efficiency and makes the space in the loft more usable.
Here are key considerations:
- Install Loft Boards Above the Insulation: Utilize loft legs to elevate the loft boards above the insulation, preventing compression and maintaining the insulation’s effectiveness.
- Across the Joists: Confirm insulation spans uniformly across the joists to avoid heat leaks and enhance stability for the storage space above.
- Using Loft Panels: Select interlocking loft panels designed for easy installation and ideal fit, confirming they rest securely on the raised framework facilitated by the loft legs.
What is the Best Insulation for a Boarded Loft
Choosing the right type of insulation for a boarded loft is essential, as it not only enhances thermal efficiency but also impacts the structural integrity and usability of the space. Selecting appropriate loft insulation is vital when installing loft boards in an attic space to create a storage area. It must support the weight of loft boards, loft legs, and small boxes without compressing, which can diminish its insulative properties. Start putting the boards in place carefully, ensuring that the insulation is not compromised in the process. Understanding how to board a loft properly ensures that the insulation remains effective, providing long-term energy efficiency while maintaining a sturdy and safe storage area. This careful approach leads to the end result of a fully functional and well-insulated loft that maximizes both storage and energy savings.
| Insulation Type | Benefits | Considerations |
| Fiberglass | Cost-effective, good thermal barrier | Can irritate skin during install |
| Cellulose | High R-value, eco-friendly | Settles over time, reducing effectiveness |
| Foam Board | High insulation value, moisture resistant | More expensive, requires careful installation |
Each type of insulation interacts differently under loft boarding, affecting the loft space’s overall functionality and energy efficiency.
What Mistakes Should You Avoid When Boarding a Loft?
When boarding a loft, certain missteps can lead to significant issues, such as compromised insulation effectiveness and structural damage. Laying loft boards incorrectly can be a real challenge if not done properly.
Boarding over insulation without proper clearance can impede airflow, leading to moisture problems and reduced thermal efficiency. It’s important to note that using a chipboard for loft boarding might not provide the best airflow, so be prepared to choose more suitable materials. Packs of insulation or boards that are too tight can create unnecessary pressure and may lose effectiveness over time. If you’re unsure at this stage, it’s handy to double-check which way to lay loft boards to avoid costly mistakes.
Additionally, securing boards directly onto joists without considering load distribution or ventilation requirements often undermines the loft’s structural integrity and can obstruct necessary air circulation. If you’re tempted to rush through the undertaking, carefully deal with all tricky spots. A poorly planned layout can make future access impossible and even result in more expensive fixes.
When working on a loft boarding project, be confident in your choices. If you suspect any potential problems, don’t hesitate to contact a professional company specializing in loft conversions. The planning will ensure you don’t face issues down the line, keeping the loft space safe, usable, and effective for years to come.
Can boarding over insulation cause long-term problems
Improper installation of loft boards over insulation can lead to several issues that compromise the structure and efficiency of your home. When planning to lay the first loft board, consider the following:
- Weight Distribution: Using loft legs helps to raise the OSB board above the level of insulation, preventing compression and maintaining the insulation’s effectiveness.
- Avoiding Damage: Guarantee your loft’s structural integrity by avoiding the direct placement of heavy boards on the insulation, which can lead to dampness and decay.
- Maximizing Storage Space: Strategically placed loft boards, supported by loft legs, optimize storage space while ensuring adequate airflow and insulation performance.
Can I board directly onto the joists?
Although it may seem straightforward, boarding directly onto joists is a practice fraught with potential errors that can compromise your loft’s safety and functionality. When laying loft boards, it is vital to avoid placing them directly on the joists without considering the insulation. This can lead to compression of the insulation material, reducing its effectiveness and potentially leading to increased energy costs. Proper installation should raise the boards slightly above the insulation, ensuring airflow is maintained, and the thermal efficiency of the loft is preserved.
| Consideration | Importance | Impact |
| Insulation Integrity | High | Prevents thermal loss |
| Structural Support | Critical | Guarantees safety and durability |
| Ventilation | Essential | Avoids moisture issues |
Loft boarding can provide valuable storage space in the UK, especially in older properties. Understanding how to lay, loft boards, is fundamental for maximizing space while preserving the underlying structure and insulation effectiveness.
What common errors affect structural integrity or ventilation
Several common errors, particularly around the hatch opening, must be meticulously avoided to guarantee the structural integrity and proper ventilation of your loft when installing loft boards.
- Improper Insulation Coverage: Not allowing adequate ventilation around the roof can lead to moisture buildup.
- Incorrect Installation Pattern: Failing to lay loft boards in a staggered pattern can compromise the structural integrity.
- Blocking Light Fittings and Ventilation Units: Verify that storage areas and loft boards do not cover light fittings or block built-in ventilation units.
Maintaining clear access to these is essential for safety and air circulation.
Understanding the Cost of Loft Boarding
Understanding the expenses associated with loft boarding begins with examining the average cost, which can vary considerably based on several factors. The size of the loft, the type of materials chosen, and the complexity of the installation process all play a significant role in the figure you’ll need to budget for. It’s essential to review these factors carefully before making any decisions.
Some simpler options, like cutting the boards to fit certain spaces, might lower the overall cost when considering fitting loft boards. A tip is to join multiple boards to reduce material waste. As with any project, a short but thoughtful approach will save you time and money in the long run.
It’s also wise to consider whether the initial costs are worth the investment regarding new builds or existing homes. Loft boarding can be a fantastic way to declutter your home by providing more storage space, but it’s important to balance that with the potential for issues like mold if not installed correctly. Be sure to talk to professionals about how to lay loft flooring boards properly to ensure ease during installation and avoid costly mistakes.
While some may recommend opting for DIY installation for a pretty good deal, it’s crucial to hold back if you’re unsure about the complexity of the process. Cut the boards to the correct size, and make sure everything is properly secured. If you want to do it yourself, read up on fitting loft boards properly to avoid mistakes.
By carefully assessing these factors, you can decide whether the extra storage will provide enough value to justify the upfront costs and the potential for added space in the future.
How Much Does Loft Boarding Cost
When considering the installation of loft boards, one must first understand the associated costs, which can vary widely depending on several factors.
Standard Loft Boards: The price of standard loft boards generally determines the base loft boarding cost. It’s important to calculate how many loft boards you will need to cover the desired amount of boarding in your new loft. If you’re unsure, factor in any additional tools or materials you may need for a proper installation.
Loft Legs and Screws: Each loft leg you are fitting requires specific screws. The costs include both the legs and the screws for each loft leg, influencing the total expense. Installing loft legs ensures that the boards are properly elevated above any insulation, preventing them from being compressed and maintaining their effectiveness.
Installation Costs: Installing your loft boards can vary, especially if professional help is sought. Installed loft boards guarantee stability and usability but add to the financial outlay. If you’re doing the job yourself, properly laying loft boards can make all the difference in avoiding future repairs and ensuring safety.
Factors Affecting Loft Boarding Expenses
Several factors notably influence the expenses associated with loft boarding, each playing a vital role in the overall budgeting for the project. Remember, the size of the area to be covered greatly affects the loft boarding cost; boarding an entire loft generally requires more materials and labor than just a section of the loft.
The purpose of the loft—whether it’s for simple storage or as a potential living space—will influence the amount of materials and the quality needed. Many homeowners often overlook this, but it’s crucial to factor in the required strength and quality of materials, especially if you’re storing heavy items.
The presence of a large loft hatch and sufficient access can reduce labor costs, making the installation process easier and quicker. However, warning and access issues can lead to higher costs and delays if you don’t have enough room to maneuver. It’s always wise to check the size and layout before proceeding to avoid unnecessary surprises.
Material choice also impacts expenses. Opting for boards that interlock in a staggered pattern can guarantee stability and minimize waste, which helps keep costs down. However, using cheaper boards may lead to more frequent repairs down the road, so it’s important to weigh these factors.
Additionally, removing old insulation and enhancing loft insulation before boarding is essential for energy efficiency but can increase costs due to the extra labor and materials involved.
One of the common loft boarding mistakes people make is not accounting for the structural integrity of the loft. If you’re unsure about the weight capacity of your loft’s joists, it’s best to consult a professional to avoid any difficult issues. Ensure the space is ready to handle the new loft boards without compromising safety.
Lastly, the need to store items in the loft can dictate the strength and quality of materials used. Heavier items like furniture or boxes will require stronger boards, inevitably influencing the overall budget.
Is It Worth the Investment?
After considering the various factors that affect the costs of loft boarding, homeowners may wonder whether the investment justifies the expense.
Loft boarding cost varies depending on several key elements:
Loft Size and Material Costs: The price per square meter for loft boards and legs can influence the overall expense. Laying loft boards over insulation is a crucial step that adds to the cost, as it ensures that insulation is preserved and not compressed.
Complexity of Installation: Costs escalate if the loft space requires additional measures to safeguard loft insulation or needs structural enhancements. For instance, raising the boards above the insulation to prevent compression can be an added cost, but it helps maintain the insulation’s effectiveness.
Regulatory Compliance: Securing planning permission, if necessary, and ensuring that the conversion of your loft meets building regulations can add to the expense. Loft boards over insulation should be installed with proper clearance to comply with building codes, ensuring adequate airflow and ventilation.
For many, the benefits—such as increased usable space and the retained benefit of their loft insulation—make the investment worthwhile, especially in homes where space is at a premium.
Conclusion
In summary, prioritize the integrity of the underlying insulation and structure when laying loft boards. Use raised loft legs to support boards above insulation, guaranteeing thermal efficiency and avoiding compression. Select moisture-resistant materials and make certain boards are securely fixed, avoiding overloading. Always consult local building regulations to verify compliance, particularly regarding load capacity and fire safety, before you install loft insulation. Proper installation not only maximizes storage space but also contributes to energy savings and the home’s structural safety.